My Journey with Kubernetes

This blog post is meant to be more of a personal journey, migrating from a server running docker & traefik, to a server running Kubernetes (k3s to be exact). I hope this might help other people that already know the basics of docker, but want to transfer that knowledge into the realm of Kubernetes.
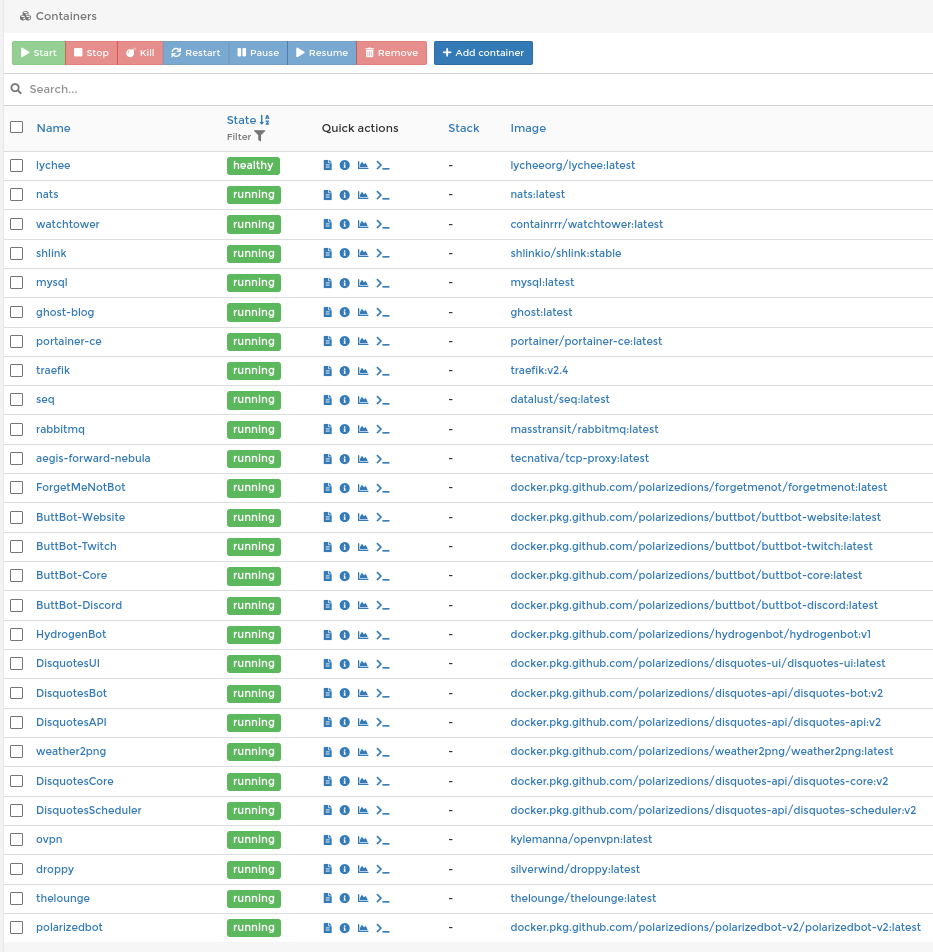
So let’s start with what we already have:
Now, I’m not going to go though the migration for each application, but I am going to give a few examples.
Setting up k3s⌗
For this I chose to run k3s, instead of the full k8s (kubernetes) stack. K3s is designed to be lightweight and performant.
Once you have your server up and running, you can run the following command to install k3s simply. In my case, my server is running Arch Linux, because why not, but the process should be similar or exactly the same for other Linux distributions.
Now, normally I would tell you not to just pipe any old content from the internet into a shell, and this is no exception! Review the contents of the installer if you value security!
curl -sfL https://get.k3s.io | sh -
We’ll then copy the kubeconfig file from it’s default location (/etc/rancher/k3s/k3s.yaml) to our local machine in case we ever need to run manual commands on it.
sudo cp /etc/rancher/k3s/k3s.yaml ~/k3s.yaml
sudo chown $USER k3s.yaml
We copy it to our home directory first, and change the owner, so we can scp it to our local machine easily.
mkdir -p ~/.kube
scp [email protected]:~/k3s.yaml  ~/.kube/config
After that, you can delete the k3s.yaml file in your server’s home directory.
Make sure to change the ~/.kube/config file locally, and edit the server url to your public dns/server ip where you installed k3s! If you have a firewall set up on your server, make sure to allow tcp/6443.
apiVersion: v1
clusters:
- cluster:
    ...
    server: https://your.tld:6443
  	...
You should now be able to run the following command and see your server name show up.
$ kubectl get nodes
NAME   STATUS   ROLES                  AGE   VERSION
alyx   Ready    control-plane,master   10m   v1.20.7+k3s1
At this point, you would join any worker nodes to the cluster, however, I’m just going to use this one node as my entire cluster.
Flux and GitOps⌗
You could do everything manually, by applying yaml files using kubectl, or helm commands, but that seems like a lot of effort. Especially bad if something goes wrong, or if you need to change something 3 months down the line. Or maybe you want to add another environment to your setup, like a staging env, or a development env. You’d have to re-do, and probably re-google, all the commands you did.
Luckely, Flux and GitOps saves our bacon.
GitOps is Ops on Git, as the name implies. It’s coding all your infrastructure and putting it in git.
Flux is a way to automatically deploy those config files from our GitOps process to our Kubernetes cluster. It will take care of watching for changes to our git repo, as well as look for updates for our running software, and update the cluster with those details.
Let’s get started with flux⌗
Following their installation guide, set the following environment variables. If you’re using something other than GitHub, look to their documentation for how to do that. You can get a personal access token here.
export GITHUB_USER=<username>
export GITHUB_TOKEN=<personal access token>
Next you need to get the flux cli, on Arch Linux, that’s as simple as installing flux-bin from the AUR. If you’re on another distribution, you can install it manually.
Make sure everything is alright, and then continue.
flux check --pre
► checking prerequisites
✔ kubectl 1.21.0 >=1.18.0-0
✔ Kubernetes 1.20.7+k3s1 >=1.16.0-0
✔ prerequisites checks passed
You can then run the bootstrap command. If you didn’t create the repository already, a private one will be created for you.
flux bootstrap github \
  --owner=$GITHUB_USER \
  --repository=fleet-infra \
  --branch=main \
  --path=./cluster \
  --personal
After a bunch of output, you should see
✔ all components are healthy
Next, we’ll clone the repo, and make some changes!
git clone ssh://[email protected]:$GITHUB_USER/fleet-infra
cd fleet-infra
Testing it out⌗
To just test that everything works, let’s install podinfo like they suggest.
Adding the source (where to find the helm charts) & installing the charts located
flux create source helm podinfo \
  --url https://stefanprodan.github.io/podinfo \
  --export > ./cluster/podinfo-source.yaml

flux create helmrelease podinfo \
  --chart podinfo \
  --source HelmRepository/podinfo
  --export > ./cluster/podinfo-release.yaml

git add .
git commit -m "added podinfo"
git push
After a little bit, you should be able to run kubectl get pods and see the pod(s) are Running.
$ kubectl get pods
NAME                       READY   STATUS    RESTARTS   AGE
podinfo-7c9fd56cb4-2985h   1/1     Running   0          81
“But hold on,” you might say, “if I go to my server’s domain, I get a nasty 404 page not found”. And that’s right! The example above doesn’t configure an ingress for podinfo, rendering it kindof useless as a web-app! Let’s fix that:
Edit the podinfo-release.yaml file, adding the values section, enabling the ingress and, setting a path it will listen on:
---
apiVersion: helm.toolkit.fluxcd.io/v2beta1
kind: HelmRelease
metadata:
  name: podinfo
spec:
  chart:
    spec:
      chart: podinfo
      sourceRef:
        kind: HelmRepository
        name: podinfo
      version: '>5.2.0'
  interval: 1m0s
  values:
    ingress:
      enabled: true
      path: /
Then commit & push your changes. You can watch for changes with
kubectl get pods --watch
Less than a minute later, you should be able to go to your server’s ip/domain and see podinfo:
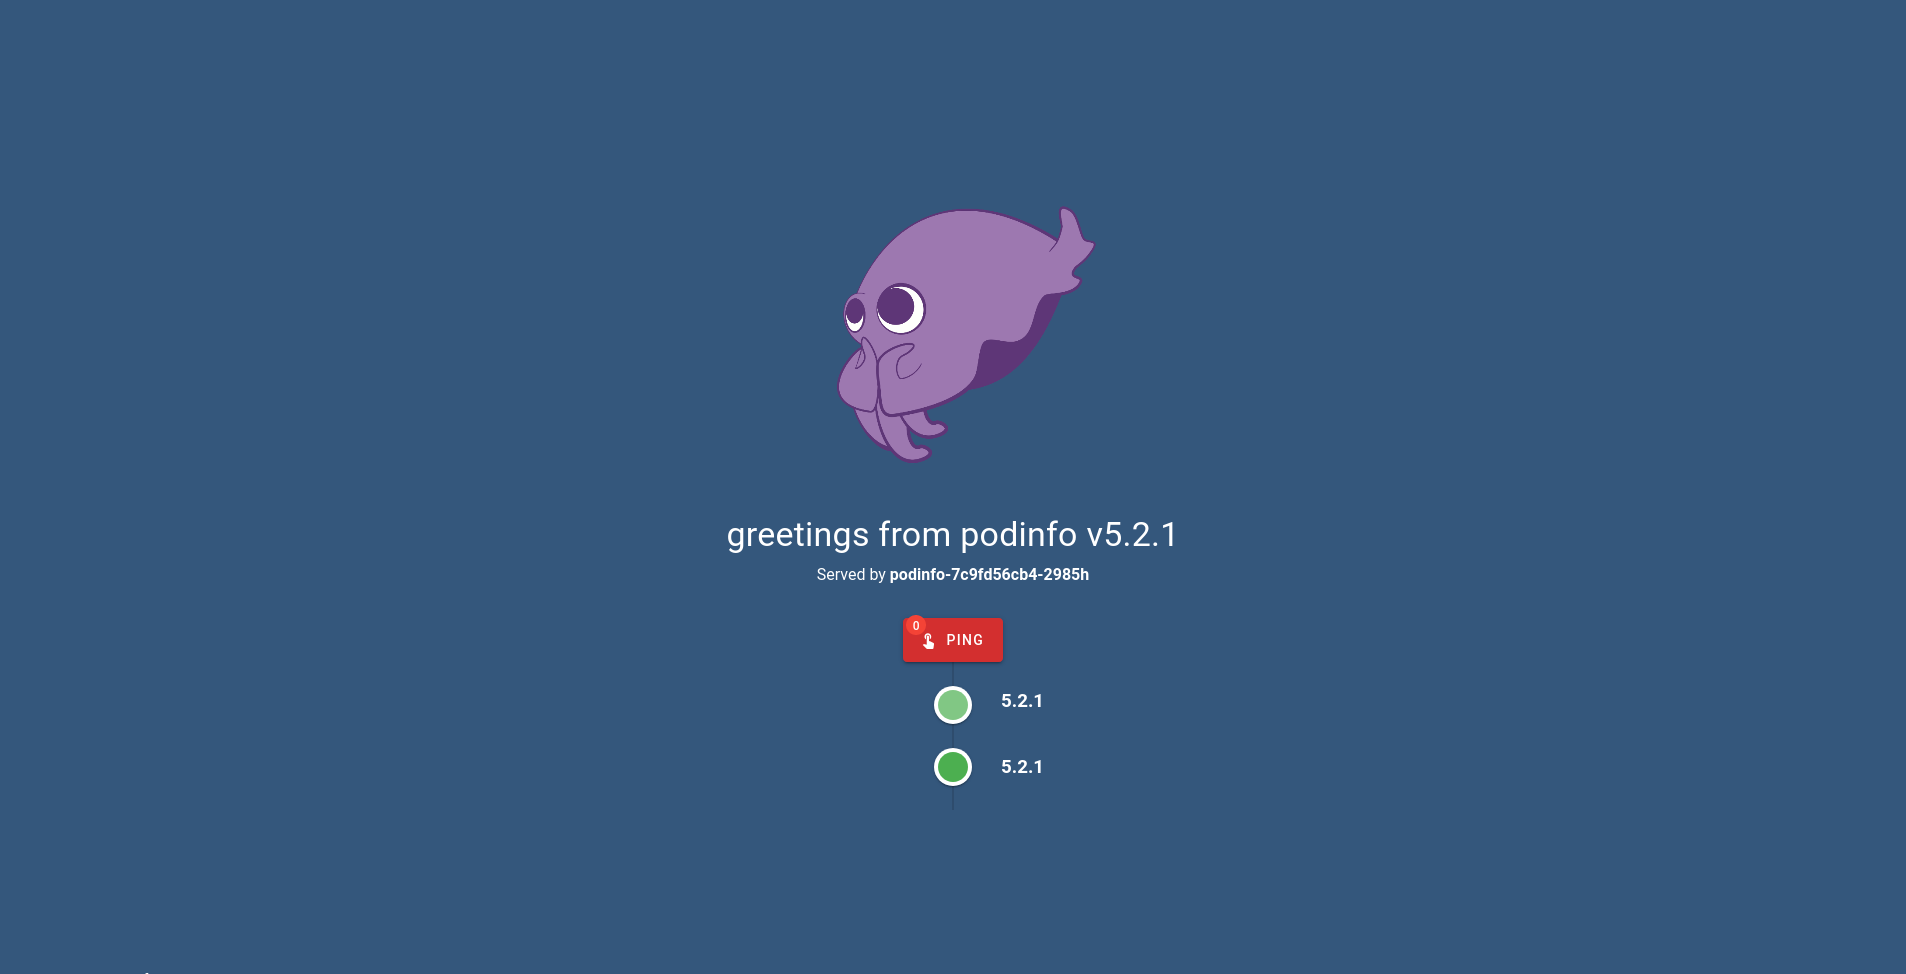
Wait, what just happend?⌗
How did I know what I needed to add to make that work?
You can think of helm being a shortcut to applying templated yaml files. The Ingress template for PodInfo is located here. As you can see, it’s just a normal kubernetes Ingress yaml file, with some templating thrown in. The values we passed in above, makes its way to this template and inserts the values where needed.
You can also see all the configurations you can add on artifacthub. Note that even though you can put other paths than /, the pretty screen above only shows up on /.
Tear it down⌗
Now that we know everything is set up correctly, we can just delete the two yaml files we created, commit and push, and flux should automatically remove podinfo. Pretty cool!
The Lounge⌗
The Lounge is a web-based irc client. It’s pretty cool if you’re into irc still! I am going to use it as an example of a stateful application. To learn more about what a stateful-, and stateless applications are, see the workloads page on kubernete’s website. Applying this to any application with a docker-image should be straight forward.
We’re going to create a couple of files for this process, though you can technically put them all in one file.
The Kubernetes way⌗
The Deployment
apiVersion: apps/v1
kind: Deployment
metadata:
  name: the-lounge
  labels:
    app: the-lounge
spec:
  replicas: 1
  selector:
    matchLabels:
      app: the-lounge
  strategy:
    type: Recreate
  template:
    metadata:
      labels:
        app: the-lounge
    spec:
      containers:
      - image: thelounge/thelounge:latest
        name: the-lounge
        imagePullPolicy: IfNotPresent
        ports:
        - containerPort: 9000
          name: http
        livenessProbe:
          httpGet:
            path: /
            port: http
        readinessProbe:
          httpGet:
            path: /
            port: http
        volumeMounts:
        - name: the-lounge-data
          mountPath: /var/opt/thelounge
        - name: the-lounge-config
          mountPath: /var/opt/thelounge/config.js
          subPath: config.js
      volumes:
      - name: the-lounge-data
        persistentVolumeClaim:
          claimName: the-lounge-pvc
      - name: the-lounge-config
        configMap:
          name: the-lounge-config
Mounting a file to the container (config - get the full config file here)
apiVersion: v1
kind: ConfigMap
metadata:
  name: the-lounge-config
data:
  config.js: |
  	"use strict";

	module.exports = {
		// ## Server settings

		// ### `public`
		//
        ...
The Persistent Volume Claim for writing logs & uploaded content to.
apiVersion: v1
kind: PersistentVolumeClaim
metadata:
  name: the-lounge-pvc
spec:
  accessModes:
    - ReadWriteMany
  resources:
    requests:
      storage: "5Gi"
The Service
apiVersion: v1
kind: Service
metadata:
  name: the-lounge
spec:
  type: ClusterIP
  ports:
    - port: 9000
      targetPort: http
      protocol: TCP
      name: http
  selector:
    app: the-lounge
And finially, the Ingress
apiVersion: networking.k8s.io/v1
kind: Ingress
metadata:
  name: the-lounge
spec:
  rules:
    - host: YOUR.HOST.HERE
      http:
        paths:
            path: /
            pathType: Prefix
            backend:
              serviceName: the-lounge
              servicePort: http
You should now see The Lounge running on your host. But this requires us to hard-code things, like the host into our ingress. Wouldn’t it be great if we could put that in a separate file and just tell kubernetes “hey, go look in this file for values?” That’s exactly where Kustomize comes in!
Kustomize works on a “patching” system, where you can define resources, and patch them to add, remove, or change certain parameters on them. This is especially useful if you want to run the same apps on multiple clusters, but with slightly different configurations – you just need to define the core app, and then patch them for each environment.
I only have one cluster, but I’m going to follow the principals anyway.
The Kustomization way⌗
Let’s start with moving the contents of the the-lounge folder out of the cluster folder and into the root of the git repo apps/the-lounge/base. Then, in there, create a kustomization.yaml file, with the follwing contents:
apiVersion: kustomize.config.k8s.io/v1beta1
kind: Kustomization
resources:
  - deployment.yaml
  - ingress.yaml
  - pvc.yaml
  - service.yaml
Notice how I didn’t include the config-map.yaml? We’re going to generate that from a file, instead of putting the file in one giant string. So copy the config.js content into apps/the-lounge/config.js, and delete the config-map.yaml file. Also, remove the host in the ingress.yaml file. We’ll specify that in just a moment outside of the “app template.”
In apps/the-lounge/ingress-patch.json, paste the following:
[
  {
    "op": "replace",
    "path": "/spec/rules/0/host",
    "value": "YOUR.HOST.HERE"
  }
]
And in apps/the-lounge/kustomization.yaml (new file), add the following:
apiVersion: kustomize.config.k8s.io/v1beta1
kind: Kustomization
metadata:
  name: the-lounge

resources:
  - ./base

patches:
  - path: ingress-patch.json
    target:
      kind: Ingress
      name: the-lounge

configMapGenerator:
  - name: the-lounge-config
    files:
      - config.js
And finally, in cluster/apps.yaml paste the following:
apiVersion: kustomize.toolkit.fluxcd.io/v1beta1
kind: Kustomization
metadata:
  name: apps
  namespace: flux-system
spec:
  interval: 1m0s
  sourceRef:
    kind: GitRepository
    name: flux-system
  path: ./apps
  prune: true
  validation: client
You should now have a folder structure like this:
.
├── apps
│   └── the-lounge
│       ├── base
│       │   ├── deployment.yaml
│       │   ├── ingress.yaml
│       │   ├── kustomization.yaml
│       │   ├── pvc.yaml
│       │   └── service.yaml
│       ├── config.js
│       ├── ingress-patch.json
│       └── kustomization.yaml
└── cluster
    ├── apps.yaml
    └── flux-system
        ├── gotk-components.yaml
        ├── gotk-sync.yaml
        └── kustomization.yaml
Explanation time:
Flux will scan our respository, in the cluster directory, for files to apply. It’ll find the Kustomization we made, refrencing the repo, but in the apps directory. It will then find all the kustomization.yaml files, and apply them.
In the main the-lounge kustomization, we tell it to find the resources in the base directory, but apply the following on top of that:
configMapGenerator, we generate the config map from the file, patches we patch (in this case add) a host to the ingress.
For more on how a multi-cluster system would look like with this system, you can check out this git repo.
Adding a user to the lounge⌗
The Lounge requires us to run a command to create users, so let’s see how that can be done:
$ kubectl get pods
NAME                          READY   STATUS    RESTARTS   AGE
the-lounge-6695b6bfd5-kmtv9   1/1     Running   0          33m

$ kubectl exec -it the-lounge-6695b6bfd5-kmtv9 -- bash

root@the-lounge-6695b6bfd5-kmtv9:/# su -u node

node@the-lounge-6695b6bfd5-kmtv9:/$ thelounge add polarizedions
2021-05-27 20:09:50 [WARN] Unknown key "prefetchMaxSearchSize", please verify your config.
2021-05-27 20:09:50 [WARN] Config file owner does not match the user you are currently running The Lounge as.
2021-05-27 20:09:50 [WARN] To prevent any issues, please run thelounge commands as the correct user that owns the config folder.
2021-05-27 20:09:50 [WARN] See https://thelounge.chat/docs/usage#using-the-correct-system-user for more information.
2021-05-27 20:09:51 [PROMPT] Enter password:
2021-05-27 20:10:04 [PROMPT] Save logs to disk? (yes) yes
2021-05-27 20:10:06 [INFO] User polarizedions created.
2021-05-27 20:10:06 [INFO] User file located at /var/opt/thelounge/users/polarizedions.json.

node@the-lounge-6695b6bfd5-kmtv9:/$ exit
root@the-lounge-6695b6bfd5-kmtv9:/# exit
First I got the pods (right now there was just one), then I exec‘ed into the pod with bash. I changed my user to node, because that’s the user they recommend running commands form, and then I ran the command to add the user.
We’re not secure!⌗
You may have noticed we’re not serving a valid ssl certificate over https. Let’s change that.
Cert-manager⌗
In the root of the repo, create a folder infrastructure, and inside that, cert-manager and sources.
Inside sources, we’re going to put these two files:
apiVersion: kustomize.config.k8s.io/v1beta1
kind: Kustomization
metadata:
  name: infra-sources

resources:
  - jetstack.yaml
apiVersion: source.toolkit.fluxcd.io/v1beta1
kind: HelmRepository
metadata:
  name: jetstack
  namespace: flux-system
spec:
  interval: 1m0s
  url: https://charts.jetstack.io
This adds the helm repository we need for cert-manager.
Next, we’ll install cert-manager: add a kustomization.yaml file to the cert-manager folder:
apiVersion: kustomize.config.k8s.io/v1beta1
kind: Kustomization
metadata:
  name: cert-manager

resources:
  - https://github.com/jetstack/cert-manager/releases/download/v1.3.1/cert-manager.yaml
This kustomization applies v1.3.1’s yaml file to our cluster.
Next up, put cert-issuer.yaml inside our cluster folder:
apiVersion: cert-manager.io/v1
kind: ClusterIssuer
metadata:
  name: letsencrypt-staging
spec:
  acme:
    email: [email protected]
    server: https://acme-staging-v02.api.letsencrypt.org/directory
    privateKeySecretRef:
      name: cert-manager-account-key-secret
    solvers:
    - http01:
        ingress:
          class: traefik
Update our ingress, by adding an annotation & tls section:
apiVersion: networking.k8s.io/v1
kind: Ingress
metadata:
  name: the-lounge
  annotations:
    cert-manager.io/cluster-issuer: letsencrypt-staging
spec:
  tls:
    - secretName: the-lounge-tls
      hosts: []

  rules:
    - http:
        paths:
          - path: /
            pathType: Prefix
            backend:
              service:
                name: the-lounge
                port:
                  number: 9000
Update our patch file, adding the host to the section:
[
    {
        "op": "replace",
        "path": "/spec/rules/0/host",
        "value": "YOUR.HOST.HERE"
    },
    {
        "op": "add",
        "path": "/spec/tls/0/hosts/0",
        "value": "YOUR.HOST.HERE"
    }
]
And finally, point to our infrastructure folder:
apiVersion: kustomize.toolkit.fluxcd.io/v1beta1
kind: Kustomization
metadata:
  name: infrastructure
  namespace: flux-system
spec:
  interval: 1m0s
  sourceRef:
    kind: GitRepository
    name: flux-system
  path: ./infrastructure
  prune: true
  validation: client
Now, when you commit and push this, it won’t immediately work! This is because that cert-issuer.yaml file is using a custom resource that is registered by cert-manager. However, flux may try to apply it before cert-manager, in which case, it will fail.
But, it will continue with the infrastructure kusomization, where it will register it, and the next time it tries to reconcile it (1min later in this case) it will succeed.
If you watch the ingesses carefully, you’ll notice a temporary one pop up. This is cert-manager doing its thing and verifying that you own the domain. As soon as it’s done, it’ll clean up after itself, and you should have a staging certificate on your domain. Exciting!
DNS challenges⌗
But what if I don’t want to do http challenges, but DNS challenges instead (like if I’m behind cloudflare?) Good thing that is also doable.
Update our cert-issuer.yaml file so it looks like:
apiVersion: cert-manager.io/v1
kind: ClusterIssuer
metadata:
  name: letsencrypt-staging
spec:
  acme:
    email: YOUR.EMAIL.HERE
    server: https://acme-staging-v02.api.letsencrypt.org/directory
    privateKeySecretRef:
      name: cert-manager-account-key-secret
    solvers:
    - dns01:
        cloudflare:
          email: YOUR.EMAIL.HERE
          apiKeySecretRef:
            name: cloudflare-apikey-secret
            key: apiKey
But, we’re not going to commit our secret to the git repo, after all, it’s reversible! Instead, we’re going to use sealed secrets.
Sealed Secrets⌗
flux create source helm sealed-secrets \
--interval=1h \
--url=https://bitnami-labs.github.io/sealed-secrets \
--export > infrastructure/sources/sealed-secrets.yaml
Don’t forget to add sealed-secrets.yaml to the sources’ kustomization.yaml file!
flux create helmrelease sealed-secrets \
--interval=1h \
--release-name=sealed-secrets \
--target-namespace=flux-system \
--source=HelmRepository/sealed-secrets \
--chart=sealed-secrets \
--crds=CreateReplace \
--export > infrastructure/sealed-secrets.yaml
Next, we need to install the kubeseal command line tool. For Arch Linux, it was as simple as sudo pacman -S kubeseal.
Commit and push at this point to get kubeseal on your cluster.
Next we run this command to fetch the public key, and put it into our repo:
kubeseal --fetch-cert \
--controller-name=sealed-secrets \
--controller-namespace=flux-system \
> pub-sealed-secrets.pem
Create our plaintext secret file:
mkdir -p infrastructure/secrets
kubectl -n default create secret generic cloudflare-apikey-secret \
    --from-literal=apiKey=keyboardcat \
    --namespace=cert-manager
    --dry-run=client \
	-o yaml > infrastructure/secrets/cloudflare-apikey-secret.yaml
Then seal it:
kubeseal --format=yaml --cert=pub-sealed-secrets.pem \
< infrastructure/secrets/cloudflare-apikey-secret.yaml > infrastructure/secrets/cloudflare-apikey-secret-sealed.yaml
You can now delete the plaintext cloudflare-apikey-secret.yaml file.
Goodbye Staging⌗
Now that all our testing is done, let’s switch to the production ACME servers - edit cert-issuer.yaml:
apiVersion: cert-manager.io/v1
kind: ClusterIssuer
metadata:
  name: letsencrypt-prod
spec:
  acme:
    email: [email protected]
    server: https://acme-v02.api.letsencrypt.org/directory
    privateKeySecretRef:
      name: cert-manager-account-key-secret
    solvers:
    - dns01:
        cloudflare:
          email: [email protected]
          apiKeySecretRef:
            name: cloudflare-apikey-secret
            key: apiKey
And your ingress’s annotation:
apiVersion: networking.k8s.io/v1
kind: Ingress
metadata:
  name: the-lounge
  annotations:
    cert-manager.io/cluster-issuer: letsencrypt-prod
...
Prometheus & Grafana⌗
Instead of going the route of applying a lot of yaml files, we’ll use the helm charts provided by the prometheus-community.
apiVersion: source.toolkit.fluxcd.io/v1beta1
kind: HelmRepository
metadata:
  name: prometheus-community
  namespace: flux-system
spec:
  interval: 1m0s
  url: https://prometheus-community.github.io/helm-charts
Don’t forget to reference it in the kusomization.yaml file!
Then we install it with helm, with a kustomization referencing it:
---
apiVersion: helm.toolkit.fluxcd.io/v2beta1
kind: HelmRelease
metadata:
  name: kube-prometheus-stack
  namespace: flux-system
spec:
  chart:
    spec:
      chart: kube-prometheus-stack
      sourceRef:
        kind: HelmRepository
        name: prometheus-community
  interval: 1h0m0s
  releaseName: kube-prometheus-stack
  targetNamespace: monitoring
apiVersion: v1
kind: Namespace
metadata:
  name: monitoring
apiVersion: kustomize.config.k8s.io/v1beta1
kind: Kustomization
metadata:
  name: prometheus-stack

resources:
  - namespace.yaml
  - prometheus-stack.yaml
You should then be able to see the pods coming up;
$ kubectl get pods -n monitoring -w
NAME                                                        READY   STATUS    RESTARTS   AGE
kube-prometheus-stack-operator-55c67b68f5-lfgz4             1/1     Running   0          4m33s
kube-prometheus-stack-kube-state-metrics-6bd9c9779f-strt4   1/1     Running   0          4m33s
kube-prometheus-stack-prometheus-node-exporter-77g97        1/1     Running   0          4m34s
alertmanager-kube-prometheus-stack-alertmanager-0           2/2     Running   0          4m25s
prometheus-kube-prometheus-stack-prometheus-0               2/2     Running   1          4m24s
kube-prometheus-stack-grafana-766c75cfbc-hsn72              2/2     Running   0          4m33s
Access the dashboard via port-forwarding:
$ kubectl port-forward -n monitoring service/prometheus-operated 9090
Forwarding from 127.0.0.1:9090 -> 9090
Forwarding from [::1]:9090 -> 9090
Then you can visit localhost:9090 to view prometheus’s dashboard.
To get to Grafana, we do the following:
$ kubectl port-forward -n monitoring service/kube-prometheus-stack-grafana 9090:80
Forwarding from 127.0.0.1:9090 -> 3000
Forwarding from [::1]:9090 -> 3000
And visit localhost:9090 again. The default user, and password we can get via:
kubectl get secret -n monitoring kube-prometheus-stack-grafana -o jsonpath='{.data.admin-user}' | base64 --decode; echo
kubectl get secret -n monitoring kube-prometheus-stack-grafana -o jsonpath='{.data.admin-password}' | base64 --decode; echo
Note, that you probably want to enable a Persistent Volume Claim for grafana, since it defaults settings and dashboards to in-memory storage:
---
apiVersion: helm.toolkit.fluxcd.io/v2beta1
kind: HelmRelease
metadata:
  name: kube-prometheus-stack
  namespace: flux-system
spec:
  chart:
    spec:
      chart: kube-prometheus-stack
      sourceRef:
        kind: HelmRepository
        name: prometheus-community
  interval: 1h0m0s
  releaseName: kube-prometheus-stack
  targetNamespace: monitoring
  values:
    grafana:
      persistence:
        enabled: true
And if you want to enable an ingress for it:
---
apiVersion: helm.toolkit.fluxcd.io/v2beta1
kind: HelmRelease
metadata:
  name: kube-prometheus-stack
  namespace: flux-system
spec:
  chart:
    spec:
      chart: kube-prometheus-stack
      sourceRef:
        kind: HelmRepository
        name: prometheus-community
  interval: 1h0m0s
  releaseName: kube-prometheus-stack
  targetNamespace: monitoring
  values:
    grafana:
      persistence:
        enabled: true
      ingress:
        annotations:
          kubernetes.io/ingress.class: traefik
          cert-manager.io/cluster-issuer: letsencrypt-prod
        enabled: true
        hosts:
          - YOUR.HOST.HERE
        tls:
          - secretName: grafana-tls
            hosts:
            - YOUR.HOST.HERE
Dependencies between pods⌗
So what do I do if there’s a dependency between pods? For example, a database pod and an application pod? Kubernetes provides the solution: init-containers.
Let’s create a small deployment that depends on mysql, with a accompanying kustomization file.
apiVersion: apps/v1
kind: Deployment
metadata:
  name: test-mysql
  labels:
    app: test-mysql
spec:
  replicas: 1
  selector:
    matchLabels:
      app: test-mysql
  strategy:
    type: Recreate
  template:
    metadata:
      labels:
        app: test-mysql
    spec:
      containers:
      - image: busybox
        name: test-mysql
        imagePullPolicy: IfNotPresent
        command: ['sh', '-c', 'echo Hello world! Mysql Is Running!']
      initContainers:
      - name: init-test-mysql
        image: busybox
        command: ['sh', '-c', "until nslookup mysql.$(cat /var/run/secrets/kubernetes.io/serviceaccount/namespace).svc.cluster.local; do echo waiting for mysql; sleep 2; done"]
apiVersion: kustomize.config.k8s.io/v1beta1
kind: Kustomization
metadata:
  name: test-mysql

resources:
  - deployment.yaml
You’ll see a new section in the deployment: initContainers.
Kubernetes will start this list of containers before the main list of conatiners in the pod, and wait for them to finish before starting the main list of conatiners.
In this example, we put a init container, which loops and checks for the existence of a mysql service in the current namespace. Effectively doing: nslookup mysql.default.svc.cluster.local until it succeeds, then exits.
If you get the list of pods now, you’ll see it’s “pending” init:
$ kubectl get pods
NAME                          READY   STATUS     RESTARTS   AGE
the-lounge-7bcbd99f4b-q9lh9   1/1     Running    2          2d6h
test-mysql-6b5858b649-8pz97   0/1     Init:0/1   0          3m41s
Let’s add a mysql container then:
Add the bitnami helm sources:
apiVersion: source.toolkit.fluxcd.io/v1beta1
kind: HelmRepository
metadata:
  name: bitnami
  namespace: flux-system
spec:
  interval: 1m0s
  url: https://charts.bitnami.com/bitnami
And add a refrence to it in the kustomization.yaml file.
apiVersion: helm.toolkit.fluxcd.io/v2beta1
kind: HelmRelease
metadata:
  name: mysql
  namespace: flux-system
spec:
  chart:
    spec:
      chart: mysql
      sourceRef:
        kind: HelmRepository
        name: bitnami
  interval: 1h0m0s
  releaseName: mysql
  targetNamespace: default
apiVersion: kustomize.config.k8s.io/v1beta1
kind: Kustomization
metadata:
  name: mysql

resources:
  - mysql.yaml
Commit and push, and watch the pods:
$ kubectl get pods -w
NAME                          READY   STATUS     RESTARTS   AGE
the-lounge-7bcbd99f4b-q9lh9   1/1     Running    2          2d6h
test-mysql-6b5858b649-8pz97   0/1     Init:0/1   0          15m
After a bit, you should see this output:
$ kubectl get pods -w
NAME                          READY   STATUS     RESTARTS   AGE
the-lounge-7bcbd99f4b-q9lh9   1/1     Running    2          2d6h
test-mysql-6b5858b649-8pz97   0/1     Init:0/1   0          15m
mysql-0                       0/1     Pending    0          0s
mysql-0                       0/1     Pending    0          3s
mysql-0                       0/1     ContainerCreating   0          3s
test-mysql-6b5858b649-8pz97   0/1     PodInitializing     0          17m
test-mysql-6b5858b649-8pz97   0/1     Completed           0          17m
test-mysql-6b5858b649-8pz97   0/1     Completed           1          17m
test-mysql-6b5858b649-8pz97   0/1     CrashLoopBackOff    1          18m
test-mysql-6b5858b649-8pz97   0/1     Completed           2          18m
mysql-0                       0/1     Running             0          26s
test-mysql-6b5858b649-8pz97   0/1     CrashLoopBackOff    2          18m
Mysql came up, and test-mysql started Crashing! Whoops!
This is to be expected though, since we didn’t tell k8s it’s a job, but a normal container. It will automatically attempt to keep the amount we specified (one in this case) containers running. Since it exits after printing “Hello world”, k8s assumes it crashed, and tries to create another container in that pod. If it fails a bunch of times, it enters a state known as CrashLoopBackOff, where it will wait longer and longer before provisioning a new container to the pod.
$ kubectl logs test-mysql-6b5858b649-8pz97
Hello world! Mysql Is Running!
To get the generated root password, you can execute the following:
$ kubectl get secret mysql -o jsonpath='{.data.mysql-root-password}' | base64 --decode; echo
AdUoJURdmi
And to access it, you can port-forward to it, and access it on localhost:3306.
$ kubectl port-forward service/mysql 3306
You can now kill the test container (delete the folder & commit and push), and install whatever you need to.
Backups⌗
I decided on my own, custom implementation for backing up my MySQL database, using this script as a docker image, ghcr.io/polarizedions/backup-mysql-b2, I can backup a MySQL db to Backblaze’s B2 platform.
All I then need to do is create a cron job for it, and specify the secrets for B2:
apiVersion: batch/v1beta1
kind: CronJob
metadata:
  name: backup-mysql
  namespace: default
spec:
  schedule: "0 1 * * *"
  successfulJobsHistoryLimit: 1
  failedJobsHistoryLimit: 1
  jobTemplate:
    spec:
      template:
        spec:
          containers:
            - name: backup-mysql
              image: ghcr.io/polarizedions/backup-mysql-b2
              imagePullPolicy: IfNotPresent
              env:
              - name: DB_HOST
                value: mysql.default.svc.cluster.local
              - name: DB_USER
                value: root
              - name: DB_PASS
                valueFrom:
                  secretKeyRef:
                    name: mysql
                    key: mysql-root-password
              - name: B2_USER
                valueFrom:
                  secretKeyRef:
                    name: b2
                    key: user
              - name: B2_KEY
                valueFrom:
                  secretKeyRef:
                    name: b2
                    key: key
              - name: B2_BUCKET_NAME
                valueFrom:
                  secretKeyRef:
                    name: b2
                    key: bucket
          restartPolicy: Never
This cron schedule runs at 1am every day. I then just put a lifecycle setting on the bucket to delete files after 7 days.
Wrapping up⌗
I’ve covered, and learnt, a lot during this blog post, so hopefully you did too! Happy Kubernetting!